Someone wrote me recently asking how I approached animating more physical shots, like my work in games for example. So I thought I'd post my general steps for a more physical shot I had done for AM. Not to say this way is the best or only way, but its what made most sense to me. I still have a lot to learn.
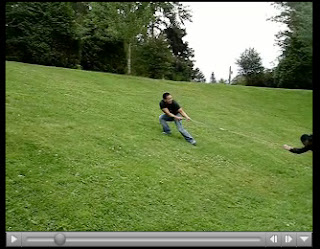
The assignment was an exercise in weight. So I chose to show a sense of weight by way of a heavy pulling situation. I'd never do this for every animation at work, but the intent here was to clarify my ideas to my mentor, Greg Kyle:

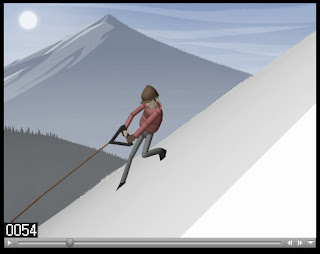
From that vid ref, I try to start cherry picking stronger poses and accentuating them. Here I'm just trying to focus on a simple clear lines of action, reverse curves, that sort of thing. This is the thing I always do at work. Except they're always messier than this. I think, again, I was just trying to clarify my ideas for my mentor to see:

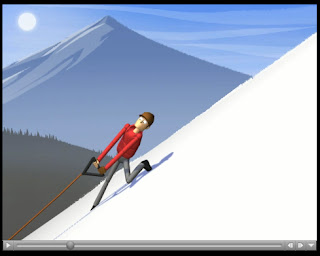
To get to this iteration is like a hundred steps later, haha. But after the timing on the main keys are working. I convert to spline mode and by then it looks ridiculous. So I added breakdowns and by then there is a key at about every 2-3 frames. Then I go in and just animate the root node
so that its arcs are nice and that spacing works. Then to the spine, head, legs, arms, usually in that order. By the end I make sure every thing is delaying or leading where it should, and all the arcs are ....."arc-like"=P. Even tracking the arc on the nose to ensure the movement on the head is solid, which is a trick I learned way later:

So there you have it! Far from perfect, but I hope this made sense and was of some help. Now, if you want to see some real animation, check this out.

man I haven't visited your space for such a long time. Quite a lot of really nice stuff here ;-) from drawing to animation.... you are doing great. I am gonna check your workspace. you are still at AM right?
ReplyDeleteHey Olivier thanks for stopping in! I'm in and out of AM depending on if I could pay for it that month or not. Which is kind of a drag. Are you graduating soon?
ReplyDeleteThanks for sharing your process Bobby... i always appreciate other sharing how they approach animation. I still find it rather vast and overwhelming.. but looking at other peoples methods helps me break things down a bit more... animation is a giant that need to be brought down piece by piece one part at a time! Thanks man!
ReplyDeleteI hope you get to join AM again i would love to have you around campus.. maybe i can shoot some of my work over your way for an honest crit? Maybe? Anywhoo.. your site kicks ass i love your drawings and your animation is awesome. Talk to you later.
i was supposed to graduate this month but my short is now about 2 minutes long. Way too hard on top of my full time job. Did you see that Pixar is advertising some positions?
ReplyDeleteGreat Site!! Bobby!!...Man.... I was laughing so hard when I thought about what the people in the park were thinking when they saw you pulling on ladies with a rope!! :) hahah
ReplyDeletemichael kors handbags, cheap oakley sunglasses, polo ralph lauren, tiffany and co jewelry, longchamp handbags, louis vuitton outlet online, michael kors outlet online, michael kors outlet online sale, nike outlet, nike air max, louis vuitton handbags, burberry outlet online, true religion outlet, ray ban sunglasses, oakley sunglasses, tiffany jewelry, gucci handbags, michael kors outlet online, michael kors outlet store, louis vuitton outlet, louis vuitton, red bottom shoes, coach outlet, ray ban outlet, tory burch outlet online, polo ralph lauren outlet, christian louboutin outlet, longchamp outlet online, coach purses, prada outlet, louis vuitton outlet, coach outlet, kate spade outlet online, christian louboutin shoes, michael kors outlet, burberry outlet online, oakley vault, true religion, prada handbags, longchamp outlet, chanel handbags, christian louboutin, jordan shoes, nike free, kate spade outlet, coach outlet store online, nike air max
ReplyDeleteswarovski uk, thomas sabo uk, louboutin, supra shoes, baseball bats, air max, hollister canada, pandora jewelry, moncler, timberland shoes, louis vuitton canada, coach outlet, moncler, oakley, juicy couture outlet, juicy couture outlet, canada goose, ray ban, canada goose pas cher, links of london uk, parajumpers outlet, pandora charms, montre femme, gucci, ralph lauren, hollister, vans, swarovski jewelry, moncler outlet, hollister clothing, uggs canada, converse, moncler, converse shoes, toms outlet, moncler, karen millen, moncler outlet, replica watches, canada goose, pandora uk, moncler, wedding dress, lancel, iphone 6 case, ugg, nike air max, canada goose
ReplyDelete